As our investment in Microsoft Teams grows, Teams governance gets more and more important. We need to build smart processes and leverage automation to scale well. This is one example of what you can do.
I recently worked with a customer in a highly regulated industry. Such organisations tend to lock down their Microsoft 365 tenants in different ways, and Teams federation (External access in the Teams admin center) is one of them. When federation is enabled, which it is by default, users can freely use chat and call with external Teams and Skype for Business users in other Microsoft 365 tenants. This is very handy but sometimes not allowed due to security or compliance reasons.
You can enable or disable federation on a tenant level, or you can block or allow specific domains. When you add one or more allowed domains, federation is only allowed with those organisations, the rest of the world is blocked. If you’ve ever had to configure Teams federation manually in the Teams admin center, then you know that this is a daunting task since you have to input one domain at a time.

In this article, I will show you how this is can be automated with PowerShell, and I will take it a step further by implementing an approval flow using Teams Approvals to make this available throughout your organisation.
Enable Teams federation for allowed domain only using PowerShell
First things first. This PowerShell script signs you into Teams, enables federation (if it was disabled), and adds a list of trusted domains to the list of allowed domains for federation (use this for bulk). Chat and calls can only be made to users in those domains when the script completes. The function Enable-TeamsFederationForAllowedDomainsOnly has a switch called -RemoveExistingDomains which resets the list before adding new domains.
# Check if the Teams module is installed.
if (Get-Module -ListAvailable -Name "MicrosoftTeams") {
    # Do nothing.
}
else {
    Write-Error -Exception "The Microsoft Teams PowerShell module is not installed. Please, run 'Install-Module MicrosoftTeams' and try again." -ErrorAction Stop
}


# Connect to Microsoft Teams.
$sfbSession = New-CsOnlineSession
Import-PSSession $sfbSession


# Get current Teams federation settings before change.
Write-Verbose -Verbose -Message "Before change:"
Get-CsTenantFederationConfiguration


# Disable communication with accounts on public IM and presence providers such as Windows Live, Yahoo, and AOL.
Set-CsTenantFederationConfiguration -AllowPublicUsers $false


# Enable Teams federation.
Set-CsTenantFederationConfiguration -AllowFederatedUsers $true


# Function to add allowed domain for Teams federation.
function Enable-TeamsFederationForAllowedDomainsOnly {
    param (
        [parameter(Mandatory = $true)]
        [string[]]$AllowedDomains,

        [parameter(Mandatory = $false)]
        [switch]$RemoveExistingDomains
    )

    # Remove existing domains (if requested).
    if ($RemoveExistingDomains) {
        Write-Verbose -Verbose -Message "Removing existing domains..."
        Set-CsTenantFederationConfiguration -AllowedDomainsAsAList $null
    }

    # Add each domain to the list of allowed domains.
    foreach ($Domain in $AllowedDomains) {
        Write-Verbose -Verbose -Message "Adding $Domain..."
        Set-CsTenantFederationConfiguration -AllowedDomainsAsAList @{Add=$Domain}
    }
}


# List of domain to allow.
$AllowedDomains = "example1.com",
"example2.com",
"example3.com",
"example4.com",
"example5.com"


# Set Teams federation settings to allowed domains only.
Enable-TeamsFederationForAllowedDomainsOnly -AllowedDomains $AllowedDomains -RemoveExistingDomains


# Get current Teams federation settings after change.
Write-Verbose -Verbose -Message "After change:"
Get-CsTenantFederationConfiguration
As an admin, this script is all you need to maintain a list of allowed domains and automate the configuration of that list in Teams. However, you can make it even better by proving a form for your users where anyone can apply for adding additional federated domains in Teams. This is where it gets really cool!
Build an Approval flow with Microsoft Forms, Teams Approvals, and Azure Automation
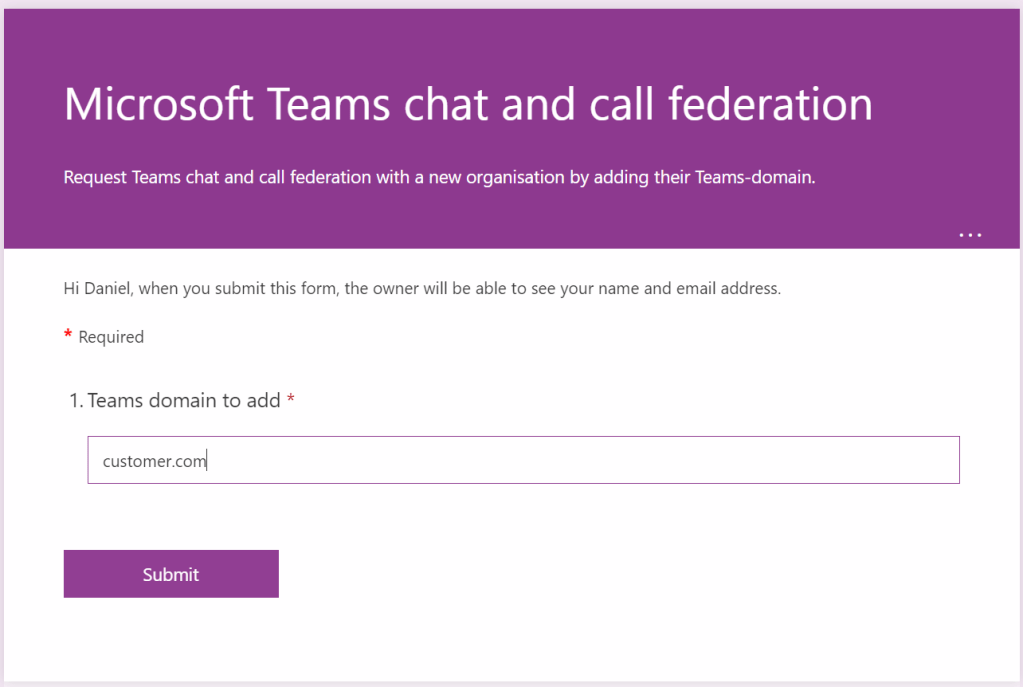
We use Microsoft Forms as our input and we will share this form with our users as a tab in Teams. This makes it easy for them to find it and to request new domains for Teams federation.
We will reuse our PowerShell script from above, slightly customised to work with Azure Automation. Since managing federation is not supported in Microsoft Graph as of writing this, we will use a service account with Teams admin permissions together with the MicrosoftTeams PowerShell module instead. Remember to add this module from the Gallery in Azure Automation. Also, make sure you protect and monitor this service account!
This is the modified script, using an Azure Automation credential called ServiceAccount for the authentication.
param (
    [parameter(Mandatory = $true)]
    [string]$AllowedDomain
)


# Connect to Microsoft Teams.
$Cred = Get-AutomationPSCredential -Name "ServiceAccount"
$sfbSession = New-CsOnlineSession -Credential $Cred
Import-PSSession $sfbSession


# Function to add allowed domain for Teams federation.
function Enable-TeamsFederationForAllowedDomainsOnly {
    param (
        [parameter(Mandatory = $true)]
        [string]$AllowedDomain
    )

    # Add domain to the list of allowed domains.
    Set-CsTenantFederationConfiguration -AllowedDomainsAsAList @{Add=$AllowedDomain}
}


# Set Teams federation settings to allowed domains only.
Enable-TeamsFederationForAllowedDomainsOnly -AllowedDomain $AllowedDomain
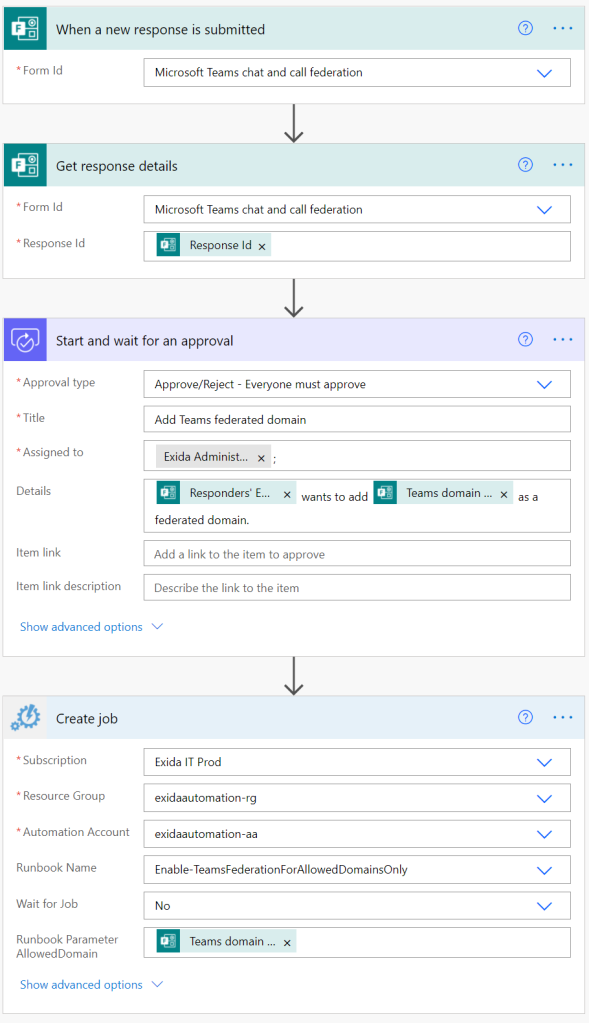
We then use the new Teams Approvals app to ping an administrator in Teams for approval before adding the new domain. We use Power Automate for this task. The flow we create will trigger when someone uses our Forms form. It then starts the approval flow and notifies the admin in Teams via chat. When the admin approves the request, Power Automate will start the Azure Automation PowerShell runbook with our script, and use the domain variable from Forms as input. And that’s the magic!
This is how the process looks in reality. First the user submits the form with the new domain:

The admin receives a notification in Teams and approves (or rejects) the request:

If the request is approved, Power Automate continues and starts the PowerShell runbook in Azure Automation.

The PowerShell script in the runbook adds the new domain as an allowed domain in Teams External access. And we’re all done!
This is how it looks in the Admin center when it completes:

I hope this inspires you to build this or similar processes for Teams governance.
Please follow me here, on LinkedIn and on Twitter!
