In my last blog post I demonstrated how a regular B2B guest user can enumerate an entire Azure AD tenant with default guest security configuration and some PowerShell magic. In this post I will demonstrate an example of what that enumerated information can be used for during an attack. We will map the entire organisation with two of the stolen attributes and Microsoft Visio. If the attacker has access to a member account instead of a guest account, job titles and department info are also included (guests can’t read those attribute by default).
The goal is to understand how the organisation looks, who is important, and who to attack next (or to impersonate). This is what we will create:

Note that the examples I provide here are proof of concepts. Don’t use it for bad things! Only use it in test tenants!
First, we need the UserPrincipalName of all users, and the UserPrincipalName of their managers. If you don’t want to create your own PowerShell script for this, you can use Get-DCAzureADUsersAndGroupsAsGuest in DCToolbox (as I mentioned from my last blog post). This tool was built for use by a guest account but it can be used by a member account as well.
Get-DCAzureADUsersAndGroupsAsGuest -TenantId '00000000-0000-0000-0000-000000000000' -AccountId 'myid@mytenant.onmicrosoft.com' -InterestingUsers 'someoneiknow@targettenant.onmicrosoft.com'
It will enumerate all users in the tenant, including manager attributes, and after that we can export the result to a CSV-file.

$FoundUsers | Export-Csv -NoTypeInformation -Delimiter ';' -Encoding UTF8 -Path 'DemoFoundUsers.csv'
Now when we have the tenant data, open the exported CSV file in Excel.

Save it as an Excel .xlsx file instead of CSV (Visio requires Excel format).

Launch Microsoft Visio and click on New. Select Organization Chart.

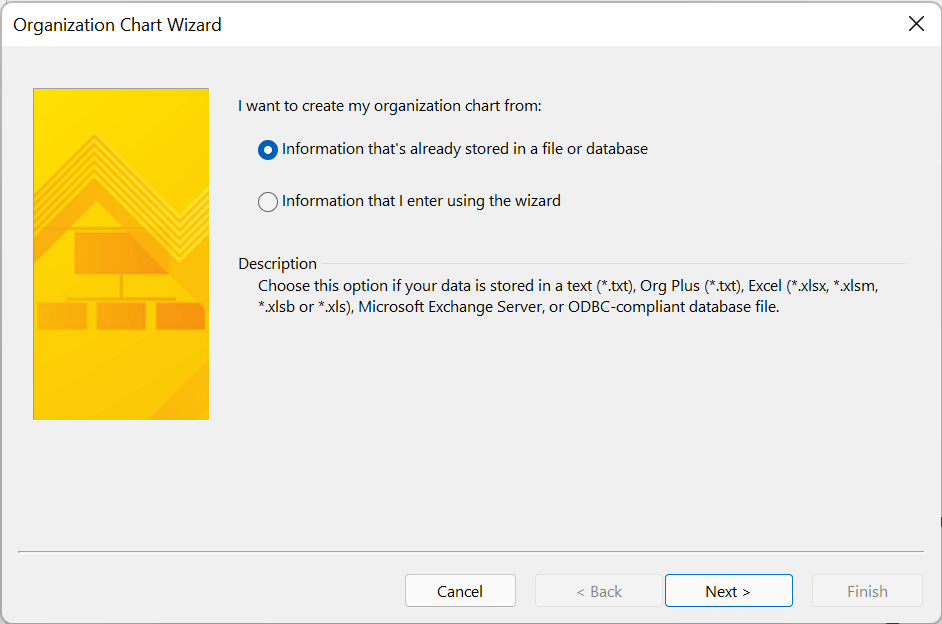
Select the Organization Chart Wizard.

Select Information that’s already stored in a file or database.
Select A text, Org Plus (*.txt) or Excel file.

Browse and select your .xlsx file and select your language of choice.

This step is important. Make sure Name is set to the UserPrincipalName attribute of the users. Reports to should be the managers UserPrincipalName, in this case we have it stored in the ManagerUpn attribute from our PowerShell export. First name can be left to <none>.

Select additional attributes you want to see in the chart. I like to have DisplayName, JobTitle and Department (note that guests cant’s read JobTitle and Department in Azure AD by default).

Click Next again.

We didn’t export any pictures, but it is possible to do that as a guest. In our case, we just select Don’t include picture in my organization chart.

Select I want to specify how much of my organization to display on each page.

It will automatically detect the top executive.

You can click on Modify Page to select from where in the organizational tree you want to create the chart, and how many additional levels to display. For example, you might be interested in a specific department. Click on OK and then Finish.

The chart is generated and this is the result:

Whit this chart, you can easily see who reports to who, and what executives to consider for your next move.
Summary
With this post, I want to shine some additional light on the default guest security settings in Azure AD and I want to make people aware that guests, just like regualr users, needs to be managed properly. But this guide can also be used for many other things. Maybe you want to do a penetration test against your own Azure AD, maybe you just want to document or understand how the organisation looks, etc. One useful use case of a chart like this that struck me is to identify who to put into your Defender for Office 365 Anti-Phishing impersonation policy. This way, you’ll make sure you have all executives in the policy.
In any case, I hope that you find this information interesting and useful!
Please follow me here, on LinkedIn and on Twitter!

Nice article. An easy way to get someones tenantID is using the following:
(Invoke-WebRequest https://login.windows.net/#DOMAINNAME#/.well-known/openid-configuration | ConvertFrom-Json).token_endpoint.Split(‘/’)[3]
Replace #DOMAINNAME# with the email domain or the tenant.onmicrosoft.com name and it will come back with a value. (but only do this for your test tenant of course)