I’ve previously blogged about how important it is for all organisations to have a break glass routine in place for their Azure AD/Office 365 tenant. Break glass accounts are excluded from many important security mechanism like Conditional Access and MFA because of their purpose to help you get back in when everything turns south. Therefor, it’s important to keep an extra eye or two on these accounts. It is also a good idea to monitor sensitive group changes, Azure AD role changes and Conditional Access policy changes.
This post will help you to get started with your Azure AD monitoring design using Azure Monitor.
Important Alert Rules
This is a list of some important alert rules everyone should have in place. They will help you to get started with your own alert rules implementation. If you’ve never created Azure Monitor alert rules before, I’m explaining how to do that further down in this blog post.
But first, let’s have a look at the recommended alert rules:
| Azure Monitor Alert Rule Name | Azure Monitor Query | Explanation |
| A high-risk sign-in was detected in Azure AD | SigninLogs | where RiskLevelDuringSignIn == “high” | Azure AD Identity Protection analyses all sign-in attempts in Azure AD. The attempts are risk evaluated and receives a risk score (low, medium, high).
This alert rule will trigger on all high-risk sign-ins. |
| A sensitive user account signed in | SigninLogs | where ResultType == 0 and (UserPrincipalName == “admin1@TENANTNAME.onmicrosoft.com” or UserPrincipalName == “admin2@TENANTNAME.onmicrosoft.com”) | Sensitive accounts, not protected by Conditonal Access and MFA, like break glass accounts and service accounts, requires extra monitoring.
This alert rule triggers on successful sign-ins from sensitive accounts. |
| A sensitive user account tried to sign in but failed | SigninLogs | where ResultType != 0 and (UserPrincipalName == “admin1@TENANTNAME.onmicrosoft.com” or UserPrincipalName == “admin2@TENANTNAME.onmicrosoft.com”) | This alert rule triggers on failed sign-ins from sensitive accounts. |
| A sensitive user account was updated | AuditLogs | where OperationName == “Update user” and (TargetResources[0].userPrincipalName in (“admin1@ TENANTNAME.onmicrosoft.com”) or TargetResources[0].userPrincipalName in (“admin2@ TENANTNAME.onmicrosoft.com”)) | project TimeGenerated, InitiatedBy.user.userPrincipalName, TargetResources[0].userPrincipalName, TargetResources[0].modifiedProperties | This alert rule triggers on account changes on sensitive accounts. This includes password changes and attribute changes. |
| A member was added to a sensitive security group | AuditLogs | where TargetResources[1].id in (‘c6754fc8-fffe-4065-a98a-f5a9ed3c43d6’) and ActivityDisplayName == “Add member to group” | project ActivityDateTime, ActivityDisplayName, TargetResources[0].userPrincipalName, InitiatedBy.user.userPrincipalName | You probably have some sensitive security groups in Azure AD that needs extra monitoring. An example of this is the Conditional Access exclude group which you use to exclude break glass accounts from all Conditional Access policies.
This alert rule triggers when a new member is added to a sensitive security group. Change the object ID of the group in the query. |
| A member was removed from a sensitive security group | AuditLogs | where TargetResources[1].id in (‘c6754fc8-fffe-4065-a98a-f5a9ed3c43d6’) and ActivityDisplayName == “Remove member from group” | project ActivityDateTime, ActivityDisplayName, TargetResources[0].userPrincipalName, InitiatedBy.user.userPrincipalName | This alert rule triggers when a member is removed from a sensitive security group. |
| A user was added to a privileged role in Azure AD (outside of PIM) | AuditLogs | where ActivityDisplayName == “Add member to role” and InitiatedBy.app.displayName != “MS-PIM” | project ActivityDateTime, ActivityDisplayName, TargetResources[0].userPrincipalName, TargetResources[0].DisplayName, TargetResources[0].modifiedProperties[1].newValue, InitiatedBy.user.userPrincipalName | It’s important to monitor changes to Azure AD admin roles. You should always use Azure AD Privileged Identity Management to manage admin accounts but this is a great complement.
This alert rule triggers when a user is added to an Azure AD role. |
| A Conditional Access policy was changed | AuditLogs | where ActivityDisplayName == “Update policy” | project ActivityDateTime, ActivityDisplayName, TargetResources[0].displayName, InitiatedBy.user.userPrincipalName | Conditional Access is the wall between your organisations cloud services and the outside world. Ones you’ve implemented your Conditional Access design, it’s important to monitor policy changes.
This alert rule triggers on Conditional Access policy changes. |
| A new Conditional Access policy was created | AuditLogs | where ActivityDisplayName == “Add policy” | project ActivityDateTime, ActivityDisplayName, TargetResources[0].displayName, InitiatedBy.user.userPrincipalName | This alert rule triggers when a new Conditional Access policy is created. |
| A Conditional Access policy was deleted | AuditLogs | where ActivityDisplayName == “Delete policy” | project ActivityDateTime, ActivityDisplayName, TargetResources[0].displayName, InitiatedBy.user.userPrincipalName | This alert rule triggers when a Conditional Access policy is deleted. |
Export Azure AD Logs to Azure LogAnalytics
If you’ve never created alert rules in Azure Monitor before, I will now teach you the basics.
Before we can setup any alert rules, we need to setup log export in Azure AD. We will export the Sing-Ins log and the Audit log to Azure Log Analytics. Log Analytics is basically a database where we can store log data and then use Azure Monitor to query this database and trigger on certain conditions.
To create a Log Analytics workspace, go to the Azure portal and search for Log Analytics workspaces. Click Add to create a new workspace.

Fill in the create form something like this.

When the workspace has been deployed, go to Azure Active Directory and click on Diagnostic settings.

Fill in the create form like this and make sure to select both AuditLogs and SignInLogs. We’ll need both logs for our rules.

Save the settings and wait. Log entries will now be exported to your new Log Analytics workspace but it might take a couple of minutes before you see any data for the first time.
Setting Up Alert Rules in Azure Monitor
Azure Monitor builds on top of Azure Log Analytics so the easiest way to create new alerts is to first perform the query in Log Analytics.
In the Azure portal, go to your Log Analytics workspace and click on Logs to open the query editor.

Put in the query you would like to create an alert rule from and click on Run to try it out. This is a great place to develop and test your queries.
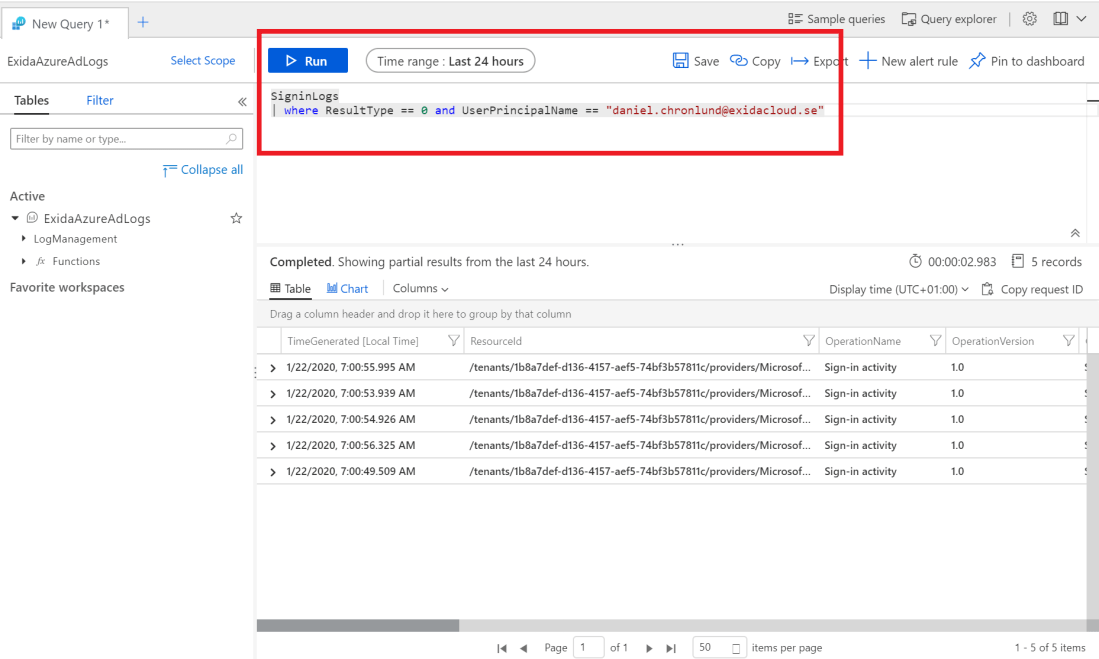
When you are happy with your query, click on New alert rule.

This will take you to Azure Monitor. Click on the condition to edit its settings.
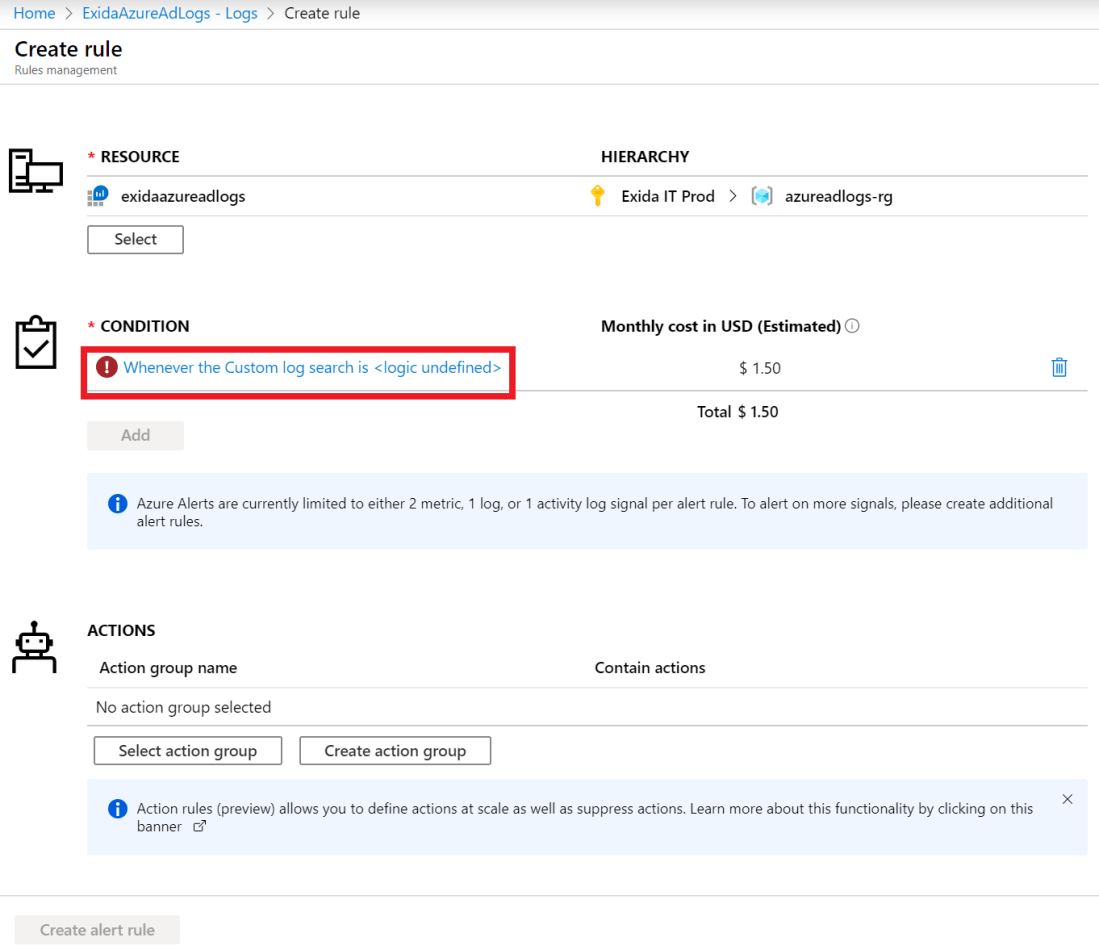
Modify Alert logic and Evaluated based on to query Log Analytics every five minutes.

If you don’t already have an action group, you’ll have to create one. An action group contains actions to perform when an alert is triggered, like send email, send SMS, and so on.
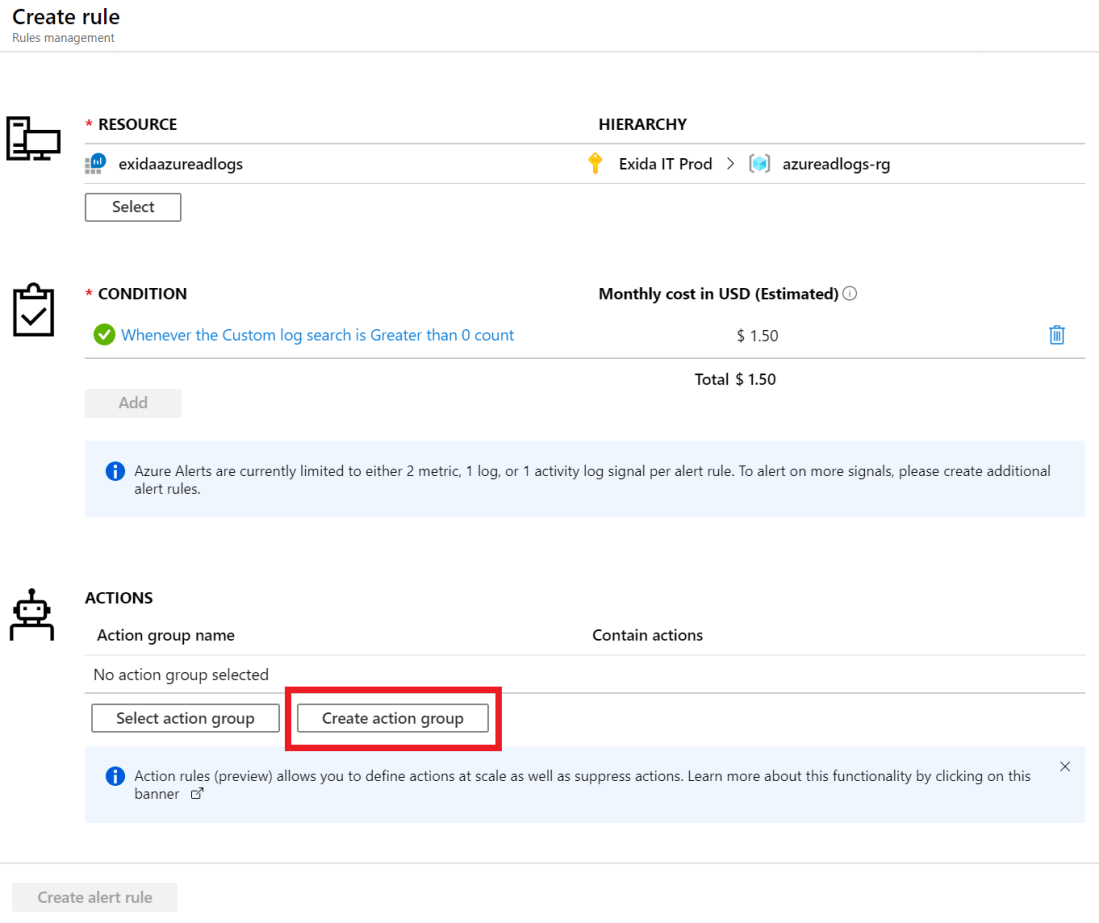
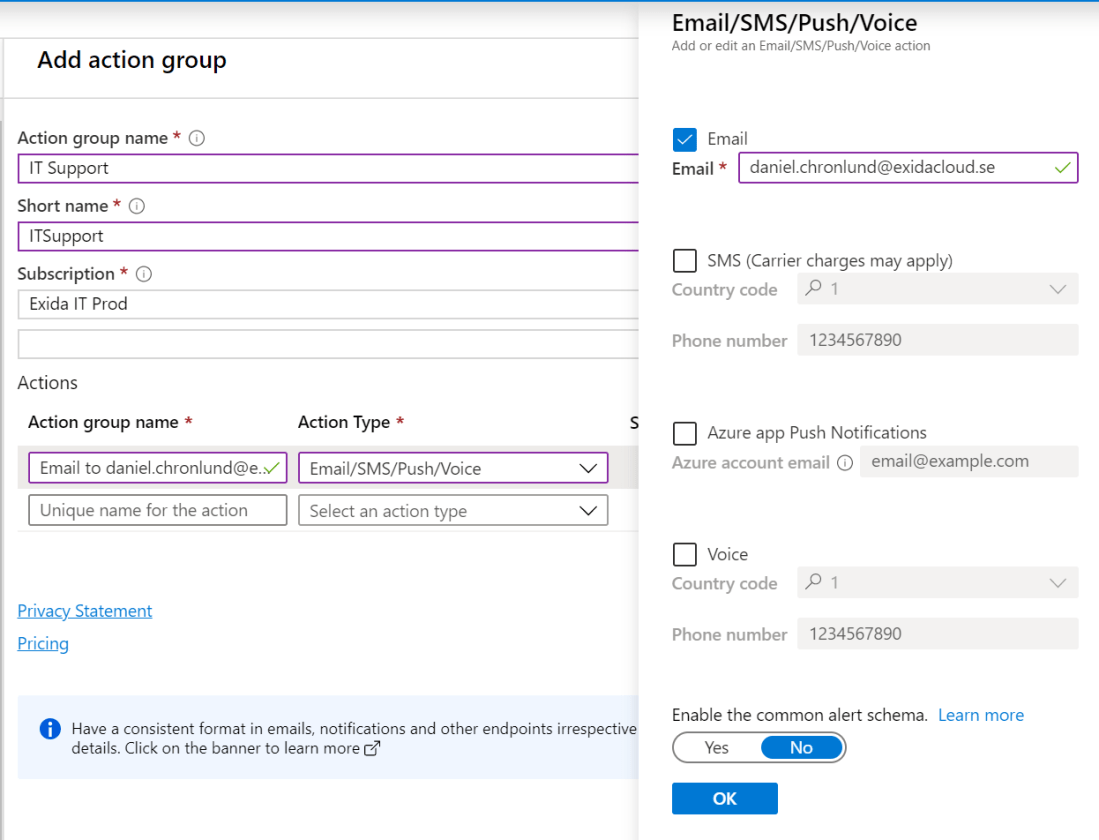
Create the action group and add actions according to your needs.
Finally, add email subject, alert rule name, a description and severity. Click on Create alert rule.

Your alert rule is now created and enabled! Repeat for the rules you need.
Conclusion
Azure Monitor is a powerful alert engine combined with Azure AD logs and it’s relatively easy to set up. I recommend all organisations to take break glass monitoring seriously and to get inspired by this blog post to create a suiting alert strategy.
Please follow me here, on LinkedIn and on Twitter.
