
The art of automating recurring work is one of the most important time-savers regardless of profession and industry. Releasing time for development and improvement work is both smarter and more satisfying for the working person. When it comes to IT and the cloud, it also happens to be an area that I’m extra found of.
Microsoft Flow
I love Microsoft Flow. Its central part of Office 365 automation really helps the user to build quick and simple automated processes. Flow is low code or no code, meaning that you do most of the flow design by clicking and dragging parts of the flow and connects them together.
One of my favorite Flow features is the Button. A Flow Button will show up in the users Flow app as a big, yeah you guessed it, button. The purpose is to give the user an easy and clear start for a particular process and also ask for any required user input if required.
Azure Automation PowerShell Runbooks
When I need to build something a little more advanced and maybe a little more flexible I always use PowerShell. I run my PowerShell scripts in Azure Automation where they are called Azure Automation Runbooks. There’s no server requirement and I just run my scripts straight from the cloud.
Flow and Azure Automation together
There are situations where it really makes sens to make Flow and Azure Automation work together. In this blog post I will explain how to provide Flow Buttons and use Flow as the user interface for your users that will then kick of Azure Automation in the background and return the PowerShell output back to the users flow app.
Step 1: Create your Azure Automation Runbook
If you don’t already have one, go to the Azure Portal at portal.azure.com and create a new Automation Account.

When you have an Automation Account you can create a new PowerShell Runbook under Process Automation > Runbooks in the menu.

Add a new Runbook and select PowerShell as the Runbook type.

Copy and paste your PowerShell script to the Runbook edit window. In this demo script we have a mandatory input parameter called CustomerName. We will set this parameter from Flow later.
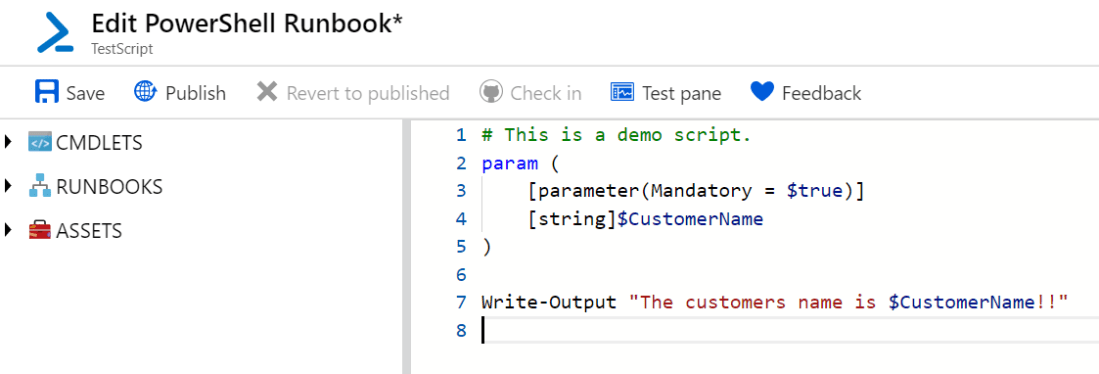
Save and then Publish the Runbook. We’re done here. Now, let’s head over to Flow.
Step 2: Create a new Flow
Okej, so start by heading over to https://flow.microsoft.com and create a new flow under My flows.
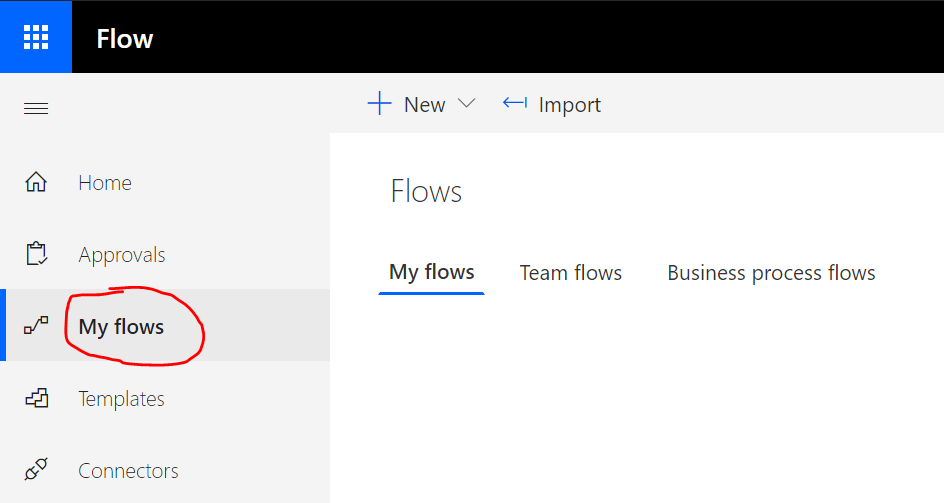
Create a new flow from blank.
Add the first trigger which will be a Flow button for mobile.

Edit the new button and add a text input that will ask for the customers name.

When the input form is done add a New step and search for Azure Automation. Choose Create job in the list.

If this is the first time that you connect Flow to Azure Automation you might need to login to Azure with your admin account.
When you are logged in, select the subscription, resource group and automation account from Azure. Also select the Runbook name, select Wait for job and fill in the parameters that Flow have loaded from the PowerShell script for your. We use the dynamic value Customer Name from the Flow Button form in the parameter field.

Now create an additional Azure Automation step that will retrieve the output from the previous Azure Automation job.

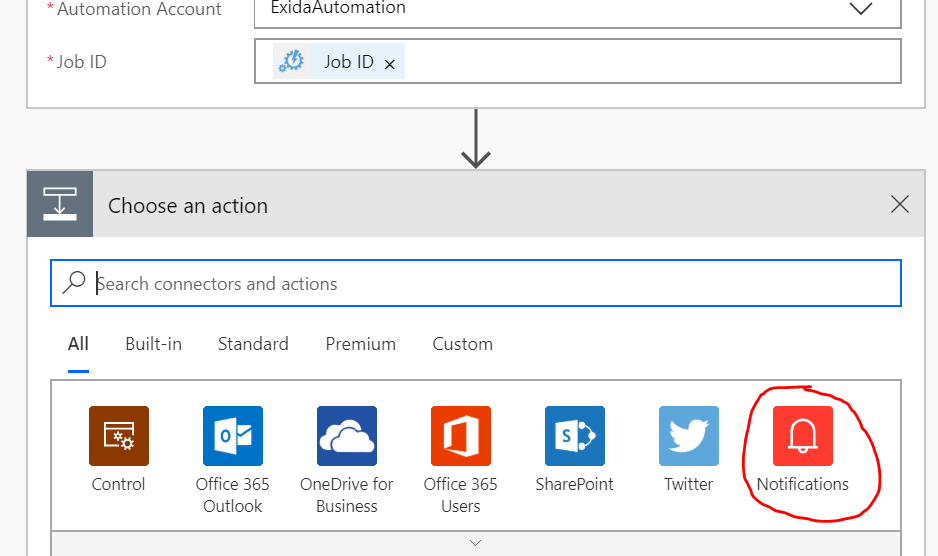
Fill in the Azure Automation information one more time and point the Job ID to the dynamic value of job ID from the Azure Automation job in the previous step.

For our last flow step we will send a push notification with the Azure Automation Runbook output to the users smartphone. Create a new step and select Notifications.
Select Send me a mobile notification and grab the Content from the Azure Automation output as the notification text.

We’re all done! Save the flow and rename it to something meaningful.

Step 3: Test the Flow Button
Install and login to the Microsoft Flow App on your smartphone.
Your Flow Buttons will show up in the Button section (Knappar in Swedish).

Simply press the button to start the flow and display the input form.

Fill in the form and then start the flow and wait for the Azure Automation job to complete and for Flow to send you the push notification with the output.

And there you have it! You can also find the push notification in the Activity section in the app.

Conclusion
By using Microsoft Flow as a user interface to kick of Azure Automation, and then take the output and show it to the user in Flow, we get a really powerful automation solution which can be extended in endless of ways.
You can use conditions in Flow to make the flow behave in different ways depending on the result of the PowerShell script. This is great for error handling or different kinds of flow notifications. You decide what will happen with the result.
I hope this blog post helped you to understand the potential with automation in the Microsoft cloud.
I would like to end this post by welcoming you to my new blog. This blog will be my little spot on the internet where I share news and thoughts about the Microsoft cloud. From time to time I will also publish a tutorial just like this one.
Thanks for reading and please follow me here and on Twitter and LinkedIn!
